Configuring Window Settings on Windows 11: A Comprehensive Guide
Introduction
In Windows 11, configuring window settings is a crucial aspect of personalizing your PC and managing your system. With the introduction of the all-new Settings app, it has become easier to access and manage various settings, including personalization, device management, network configuration, accounts, and more. In this article, we will guide you through eight ways to access the Settings app and configure your Windows 11 PC to your liking.Method 1: Setting> This PC
The simplest way to access the Settings app is by using the Start button. Click on the Start menu and select "Settings." On the Settings window, you will see various sections, including Personalization, System, and Accounts. Alternatively, you can use the keyboard shortcut Windows + I to open the Settings app directly. This shortcut is convenient and saves time.Method 3: Action Center
This particular example perfectly highlights why Configuring Window Settings On Windows 11 is so captivating.
Another way to access the Settings app is through the Action Center. Click on the Action Center icon in the taskbar and select "Settings."Method 4: Taskbar Right-Click
You can also access the Settings app by right-clicking on the Start button in the taskbar and selecting "Settings."Method 5: Desktop Shortcut
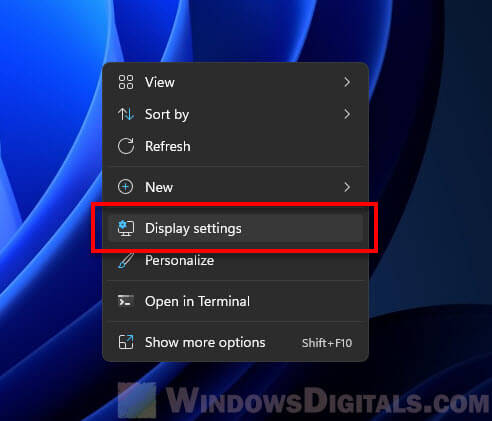
To create a shortcut on your desktop, right-click on the desktop, select "New" > "Shortcut," and enter the following path: "ms-settings:system." This will create a shortcut to the System settings in the Settings app.Method 6: Explorer
Method 7: File Explorer
Another method is to open File Explorer, click on "This PC," and select "Settings."Method 8: PowerShell
If you're familiar with the command line, you can use PowerShell to open the Settings app. Open PowerShell and enter the following command: "start ms-settings:"Top Settings to Configure