How to Create a Bootable Windows 11 USB: A Step-by-Step Guide
Introduction
Are you looking to create a bootable Windows 11 USB? Do you want to upgrade from Windows 10 or reset a sluggish system? Look no further! In this comprehensive guide, we'll walk you through the easy steps to create a Windows 11 bootable USB using the Media Creation Tool.exe tool. With a reliable internet connection, a blank USB drive, and a product key (optional), you'll be ready to start the installation process in no time. Before we dive into the process, make sure you have the following tools:- A blank USB drive with at least 8GB of free space
- A reliable internet connection
- Windows 11 media creation tool (available for download from Microsoft)
- Product key (optional)
Method 1: Using the Media Creation Tool
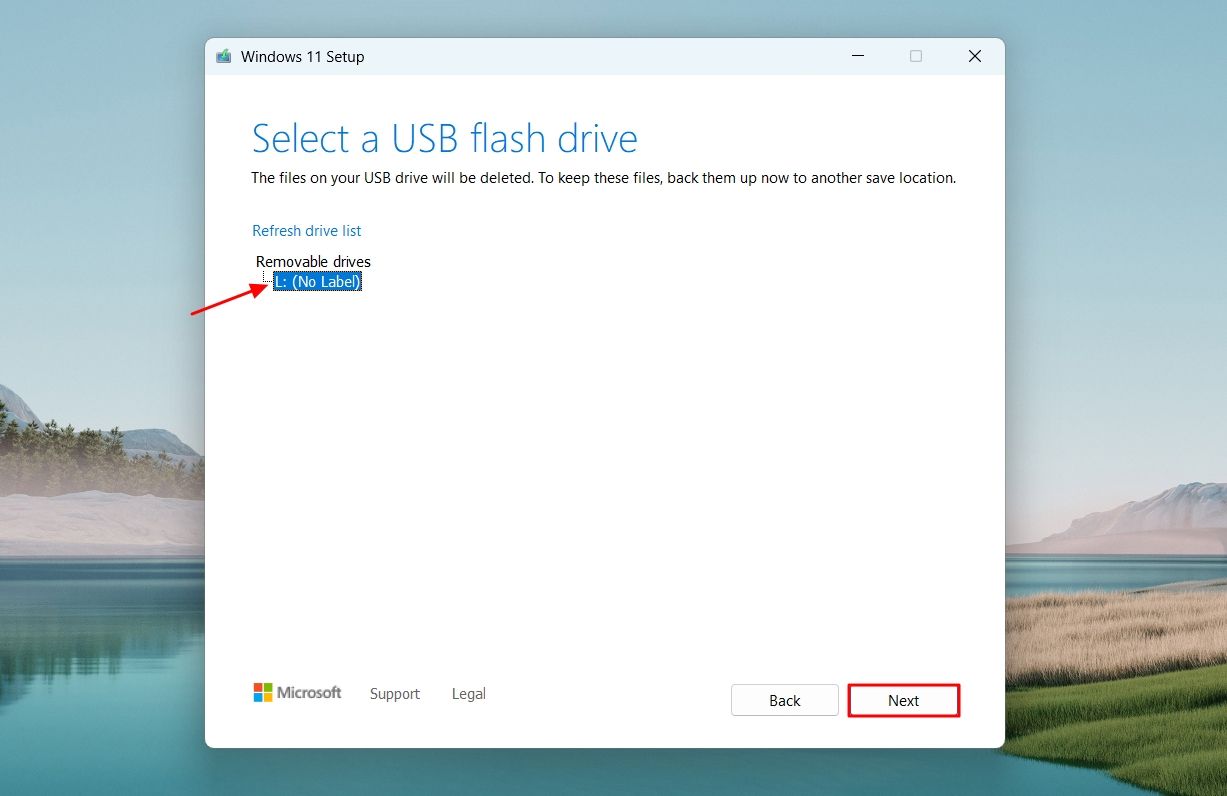
The Media Creation Tool is the official tool provided by Microsoft to create a Windows 11 bootable USB. Follow these steps:- Download the media creation tool from the official Microsoft website.
- Run the tool and select the language and architecture (64-bit) of your Windows 11 installation.
- Insert the blank USB drive and select it as the destination for the installation.
- Choose the type of installation you want to perform (Windows 11 installation media or ISO)
- Select the USB drive as the target device and start the creation process.
- Wait for the process to complete, and your bootable USB drive will be ready.
Method 2: Using Rufus
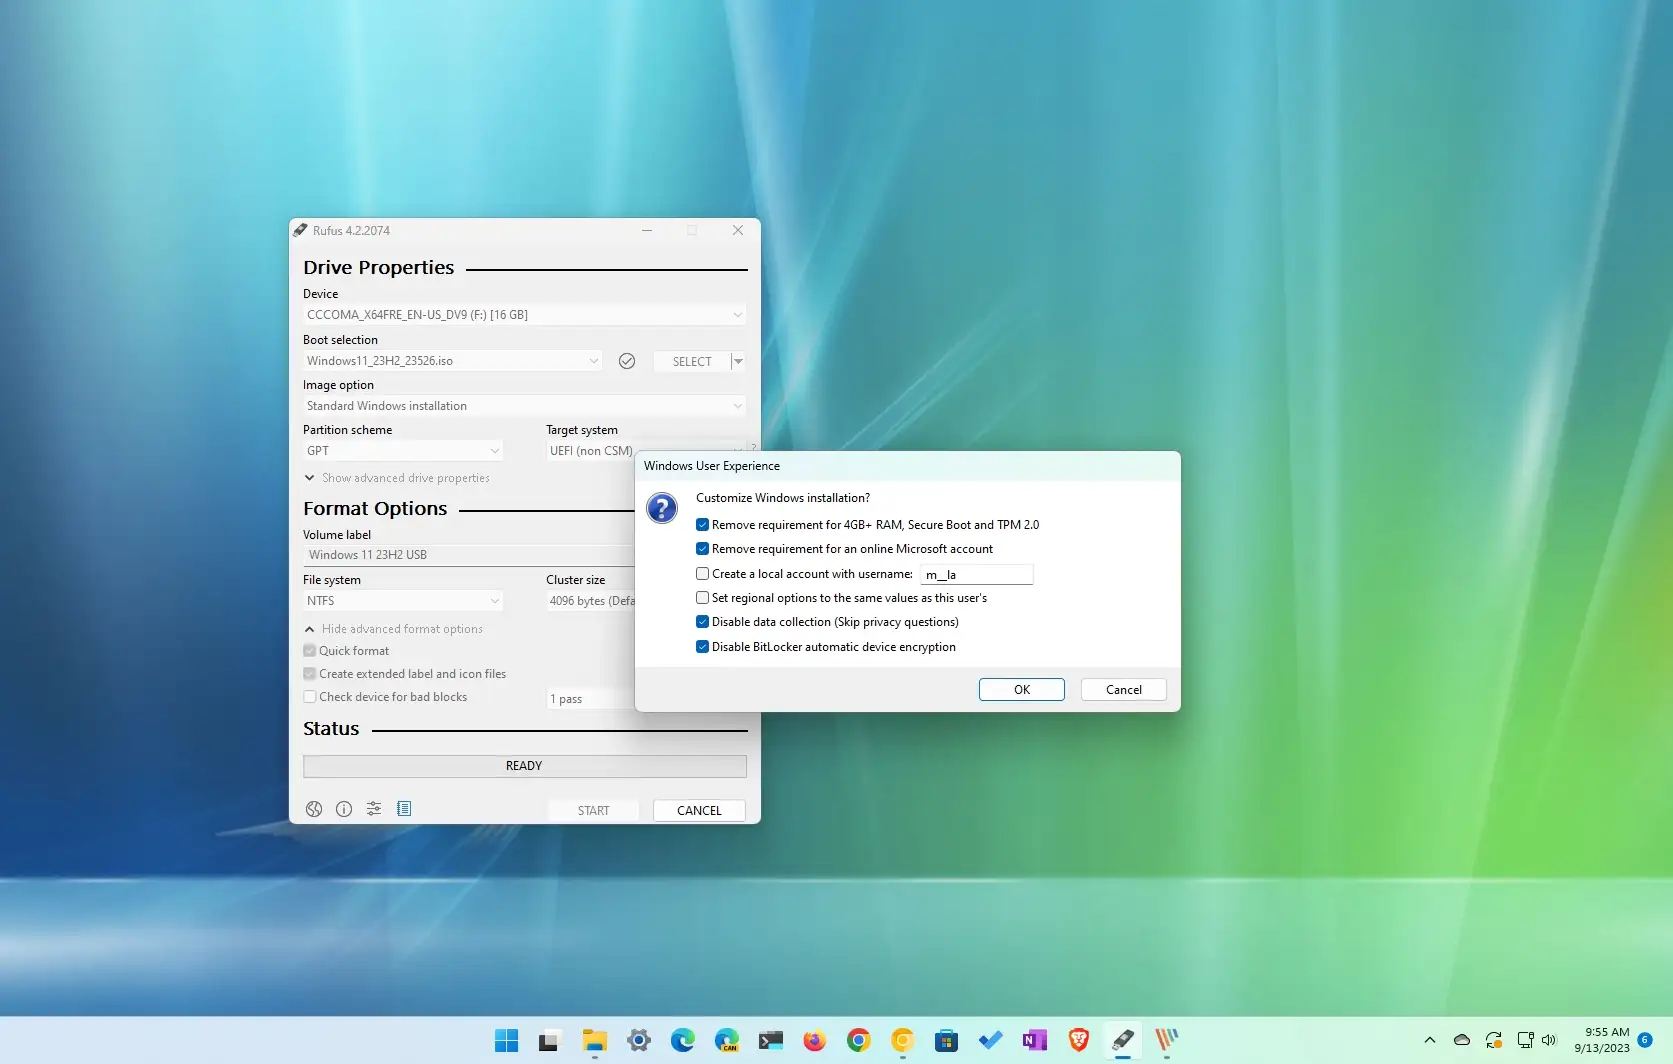
Rufus is a third-party tool that allows you to create a Windows 11 bootable USB. Follow these steps:- Download Rufus from the official Rufus website.
- Launch Rufus and select the USB drive you want to use.
- Choose the ISO file you downloaded earlier and select it as the source.
- Make sure the settings are correct, including the partition scheme and targetuffman configuration.
- Start the creation process and wait for Rufus to create the bootable USB drive.
This particular example perfectly highlights why How To Create A Bootable Windows 11 Usb is so captivating.


")

")
:max_bytes(150000):strip_icc()/A6-WaystoCreateaWindows11BootableUSBDrive-annotated-9b17a1f7932b4782a77942537afa9c75.jpg "Boot Surface from a USB device | Microsoft Support")


 - Techworm")
")


 - iBoysoft")
 - microsoft.com")